
Table of Contents
Microsoft Remote Desktop on macOS
This page describes how to connect to a Windows system at the institute, from your own Mac, either on the laptop or wireless network, or from outside the institute.
Tunnel (from commandline)
First, a secure tunnel has to be set up using ssh. The tunnel connects a local port to a remote port on a specific machine. The port we want here is 3389, which is the port of the remote desktop protocol.
Sterrewacht example
This example logs in to ssh.strw.leidenuniv.nl and sets up the tunnel to host remote (the terminal server of the Sterrewacht). Instead of remote you can fill the name of your windows desktop computer:
ssh -L 3389:remote:3389 username@ssh.strw.leidenuniv.nl
LION example
If you want to connect to a LION desktop, for example QO52, you have to connect to the LION SSH server ssh3.physics.leidenuniv.nl:
ssh -L 3389:QO52:3389 username@ssh3.physics.leidenuniv.nl
Notes
Now, you probably don't want to remember this and type it all the time, so an easy solution is to add an alias in your .profile (which contains the settings that are executed every time you open a new shell in a terminal):
alias remote='ssh -L 3389:remote:3389 username@ssh.strw.leidenuniv.nl'
Some additional notes:
- Users should use the appropriate ssh server for their own institute
- The Windows machine to log in to can just as well be your own Windows desktop, if you have one
- The
username@part can be omitted if you have the same username locally on your Mac and on the ssh server. - To avoid typing your password each time you set up an ssh tunnel, you could create an ssh keypair.
Tunnel (GUI)
Another way to ease the setup of the ssh tunnel, is to use an additional application that manages these tunnels. Some choices are:
Microsoft Remote Desktop client
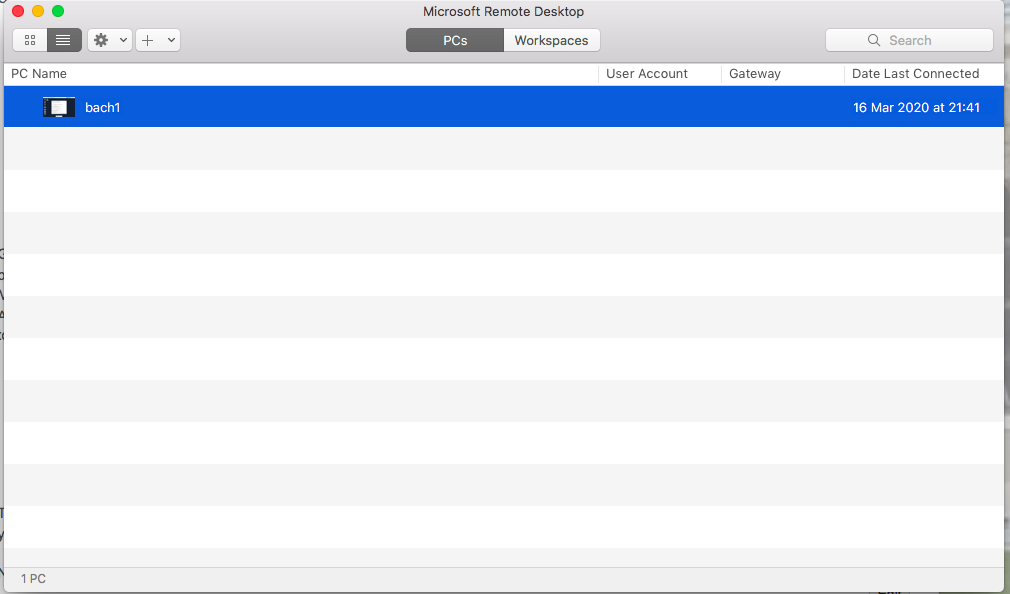
Microsoft has a rdp client for Mac, available for free through the App store. Download and install it, and then start it up. It will look like this (after you click the PC + ):
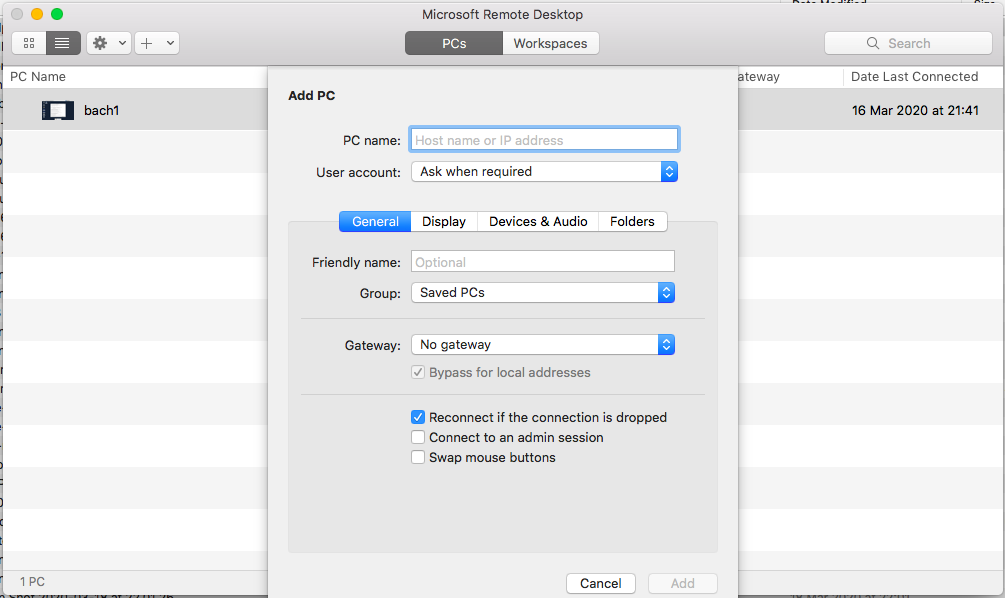 After you clicked the “+” you can add a new connection. This screen will pop up:
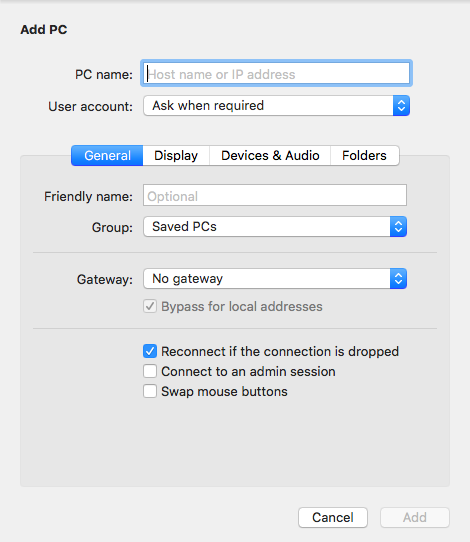 Give the connection a name that makes sense to you to remember. As pc name, fill in
 localhost. This will make the app connect to the local rdp port, which is forwarded through the tunnel to the remote machine.
You can also fill in the username if you want (or do that on the login screen). Make sure however, to add the domain, so in this case: STERREWACHT\username or PHYSICS\username.
Close this window when done (use the Add button).
Back in the first screen, it is time to start the connection. Click on the 'Friendly name' to start the connection.
 You first have to specify your login information:
 Before you get to the windows login screen, a certificate warning is presented to you as in this image:
 The reason is, that you are connecting to
 localhost but the certificate is valid for the actual computer name. It is safe to accept this certificate and you can check the box to accept it permanently, so you will not get the same warning the next time.
Now you should see the familiar Windows log in screen and you can go about your business.
To access the remote system more quickly, you can save your username and password for your connection. To do this, go to Preferences (under the Microsoft Remote Desktop menu at the top), select the tab User Accounts and press the + button:
 Fill in your username and password, give it a
 Friendly name and press Add:
 In the connection profile, you can select the
 Friendly name account under the User account:

