
Table of Contents
![]()
Mozilla Thunderbird
Mozilla Thunderbird is the stand-alone mail client derived from the Mozilla suite. If you don't need an integrated webbrowser, chat client, html editor and more, then consider using Thunderbird as your browser. Other advantages:
- Easier configuration
- Enhanced spamfilters
- Faster, and requiring less memory (but that depends a lot on the installed extensions
Switching your default mail client
Gnome users can set their default mail client from the Preferences menu, item Preferred applications.
Users of other desktop systems may want to run gnome-default-applications-properties from the commandline to set the same preferences, since many programs look here to find out which application to start when a mail link is clicked.
Plugins and externsions
Installing extensions is not quite straightforward in Thunderbird. From the Tools menu, you choose extensions, and follow the link to the extensions archive at the mozilla firefox site. This actually opens in your default browser (probably firefox or mozilla). Unfortunately, if you click the “install” link or button, this will attempt to install the thunderbird plugin in your webbrowser, which will not work (except for a few extensions which work in thunderbird and firefox both). Instead, right-click on the install link, and save the extension locally. Now go back to the thunderbird extensions manager and click “install” and locate the extension you just saved.
Setup to access our mail server
Here is a description of how to setup your Thunderbird program on the Linux desktops. THe description and screenshots are from a somewhat older version; the current setup works easier. This description will be removed or replace by an updated description in the near future.
Setup is almost identical for all other operating systems. On a Linux command line type: thunderbird, or choose the application from the menu. The startup screen will appear:

Choose to setup an E-mail account and click next.
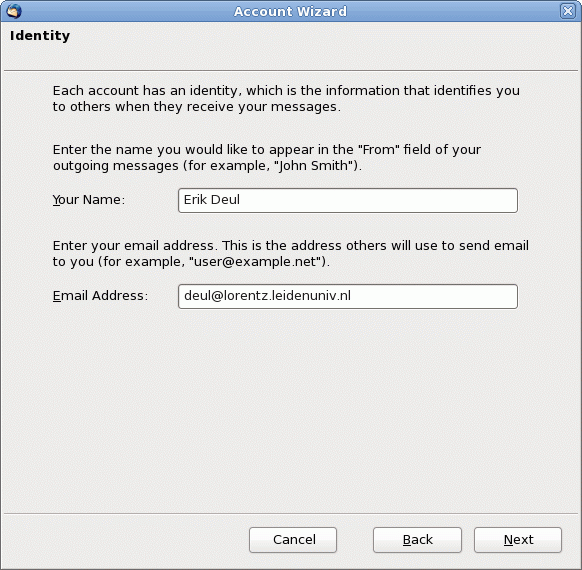
You will be presented with the identity window. Please enter your Full name and email address in the appropriate boxes and click next
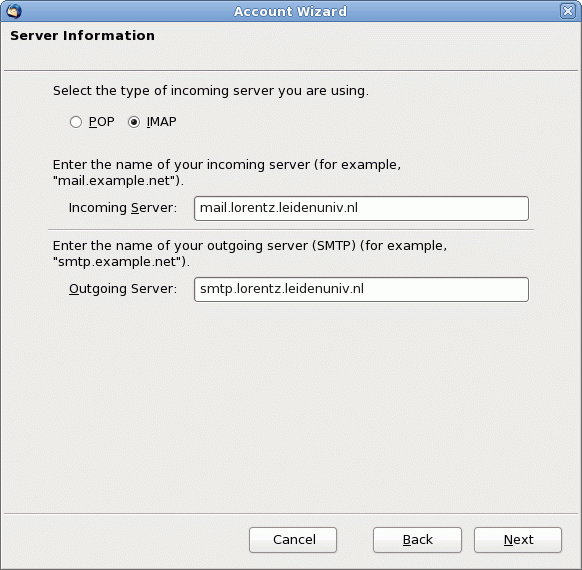
Fill out the Server information form by selecting the IMAP protocol for email interaction and specifying the incoming server and outgoing server according to the shown example. Click next to continue.
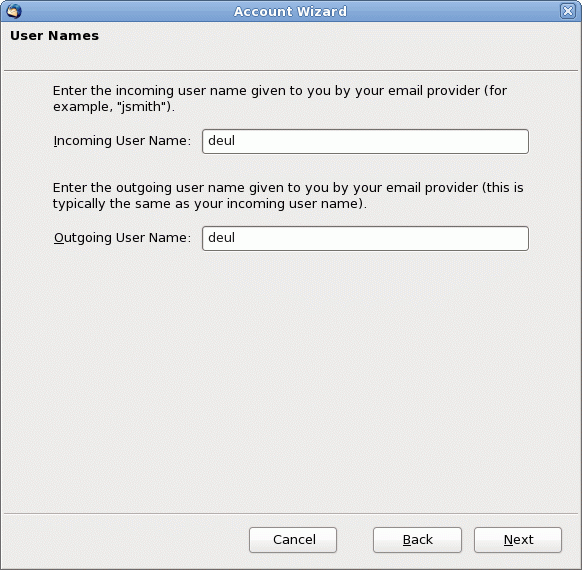
For both reading and sending emails you need to identify yourself to the mail server. Enter in both boxes your username (your login name). Click next to continue.
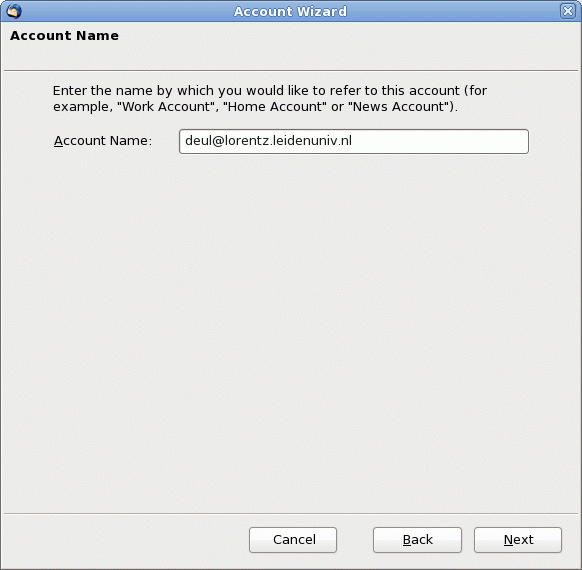
Enter your full email address in the Account name form. It is the email address you use to correspond with. Normally it consists of your login name with the domainname appended (@physics.leidenuniv.nl for LION; @strw.leidenuniv.nl for Sterrewacht; @lorentz.leidenuniv.nl for Institute Lorentz). Click next to continue.
Make sure you have typed everything correctly and click next to continue or Back if you have made a mistake.

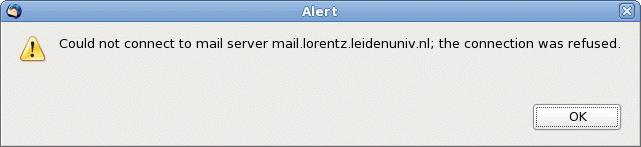
Upon clicking the next button Thunderbird will try to connect to the mail server. Click OK to continue for setting up the secure connection type.
On the main Thunderbird window you will see your accountname in bold in the left panel. Right click on that and choose Properties to open the Account Settings window as shown below.

From the left panel choose 'Server Settings' by clicking on that text. The right panel will change to show the below displayed window.
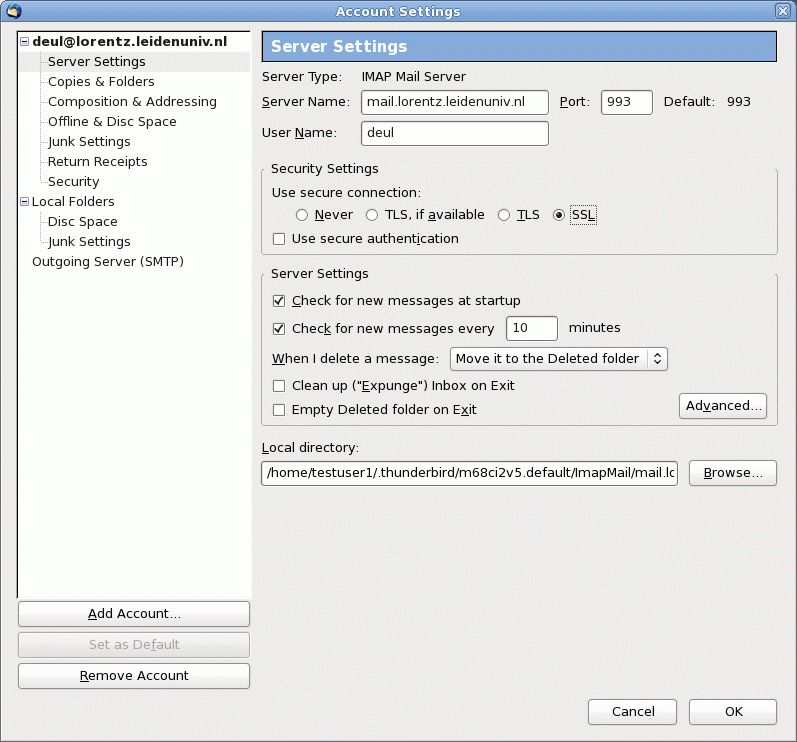
From the 'Use secure connection' options choose the SSL type. When you change this you will see the IMAP mail Server port number change from 143 to 993. Having done this now click on the 'Outgoing Server (SMTP)' text in the left panel. The right panel will change to the window shown below.

You have one outgoing server in the right panel. Select it and click the Edit button to the right. The SMTP Server window will pop-up.
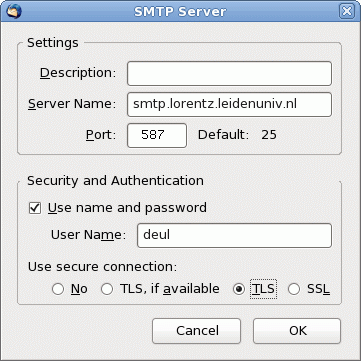
Change the default port number of 25 into 587 (to avoid problems with external providers that block outgoing traffic to port 25). To enable secure outgoing connections select the TLS option from the 'Use secure connection'. To confirm this selection click the OK button. And once more the OK button on the Account Settings window.


