This is an old revision of the document!
Table of Contents
Meetnet Storage Server
Connecting to data03
In order to save your data onto your own PI area one needs to mount the appropriate share. Here you see the available share names. You only have access to the PI share you have been assigned to by system management. If you need access to other PI share, please contact the PI and system management.
There are three ways to connect to the shares. The simple way is from the meetnet PC or your personal desktop. Alternatively you can connect to these shares using an VPN. Both methods are described below.
New setup
The data03 storage system has been setup a little different than the data02 system. The main differences are
- You cannot connect to a PI share if you are not a member of the PI user group. This means that you cannot mount a share from another PI, unless you have been explicitely given the right to do so.
- Each share has its own quota. This way no one can fill up the storage system to such a level that all other PI's are blocked saving their data.
- Upon initialization each PI share has been given 1.25 * (current data02 use).
- If you exceed 90% of your allocated quota, the PI will be informed of this fact by an email from the system
- The Delft server is fully synced with the Leiden server, so there is no true backup facility anymore. The Delft server has a life copy of all data from the Leiden server.
- This mechanism has been chosen because in the past 6 years use of
data02we have never received a request to restore a backup from data. - Not maintaining backups, but just a life sync is a considerably cheaper solution, thus allowing us teo have a bigger main storage size.
- The current total storage capacity is about 450TB and can be extended stepwise with 200TB blocks until 50PB…
Facing out data02
It is your responsibility to copy all relevant data from data02 to the new data03 system. We ask you to do so as system management has no clue to the data management of your scientific date. We also ask you to take this opportunity to weed out unnecessary data from data02 and only move essential data to data03. System management can help you to perform the actual copying of data if it concerns 'easy' full directory transfer. But, please, take this opportunity to look at your data and sift out unnecessary information before transering it to data03.
The data02 system will stay alive for the coming months, but as it is aleady a 6 year old piece of hardware, there is no guarantee it will stay fully functional for a long time. We plan to shutdown data02 in october 2022. So make sure you have copied all your important data by then.
Please inform us when you have transfered your data storage use from data02 to data03, because we will then close your data02 share for writing. This ensures that no one in your group can accidentily still write science data to the old storage.
Connect from your desktop or Meet PC
 To mount the PI share on your desktop, go to the Computer icon on your desktop or select
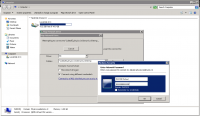
 Start->Computer from the windows bar to open Windows Explorer. Click on the Map newtork drive to open the network mapping utility. If you do not see the Map network drive option in the top bar, press the Left ALT key to show this bar is it is not visible. Once the Network Mapping utility is opened, select a drive letter and for the Folder type:
\\data03.physics.leidenuniv.nl\pi-xxxx
where xxxx is the name of your PI. Select both the Reconnect at login and Connect using different credentials options. Click on Finish to continue the mounting process.
You will be presented an Authentication windown on which you have to specify as username: PHYSICS\yourname and of course your own password. Then click OK to finish the mounting process.
Connect from your laptop or from home
Local machine we can trust, but your personal laptop or your machine at home may be connected from Internet so you need to build a secure connection to see the files on the data storage device. This can be done by setting up a VPN connection.
To setup a VPN connection see the How to setup a VPN pages.
Once the VPN connection is active you can use the above method to connect to data03.

